
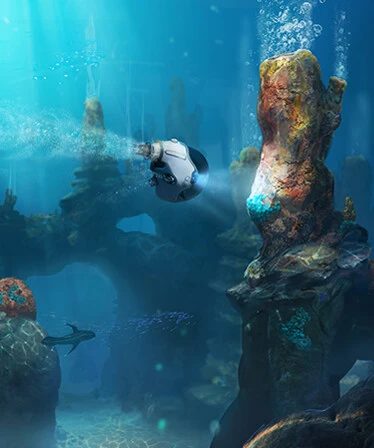
Vollständiger Proteus Karten-Guide - Environment 100% Checkliste
Von Team Wand
Kein Bild
Area Temperature Proto
Kein Bild
BO Current Vent Large
Kein Bild
BO Current Vent Large
Kein Bild
BO Current Vent Large
Kein Bild
BO Current Vent Large
Kein Bild
BO Current Vent Large
Kein Bild
BO Current Vent Large
Kein Bild
BO Current Vent Medium
Kein Bild
BO Current Vent Medium
Kein Bild
BO Current Vent Medium
Kein Bild
BO Current Vent Medium
Kein Bild
BO Current Vent Medium
Kein Bild
BO Current Vent Medium
Kein Bild
BO Current Vent Medium
Kein Bild
BO Current Vent Small
Kein Bild
BO Heat Vent Large
Kein Bild
BO Heat Vent Large
Kein Bild
BO Heat Vent Large
Kein Bild
BO Heat Vent Large
Kein Bild
BO Heat Vent Large
Kein Bild
BO Heat Vent Large
Kein Bild
BO Heat Vent Large
Kein Bild
BO Heat Vent Large
Kein Bild
BO Heat Vent Large
Kein Bild
BO Heat Vent Large
Kein Bild
BO Heat Vent Large
Kein Bild
BO Heat Vent Large
Kein Bild
BO Heat Vent Large
Kein Bild
BO Heat Vent Large
Kein Bild
BO Heat Vent Large
Kein Bild
BO Heat Vent Large
Kein Bild
BO Heat Vent Large
Kein Bild
BO Heat Vent Large
Kein Bild
BO Heat Vent Large
Kein Bild
BO Heat Vent Large
Kein Bild
BO Heat Vent Medium
Kein Bild
BO Heat Vent Medium
Kein Bild
BO Heat Vent Medium
Kein Bild
BO Heat Vent Medium
Kein Bild
BO Heat Vent Medium
Kein Bild
BO Heat Vent Medium
Kein Bild
BO Heat Vent Medium
Kein Bild
BO Heat Vent Medium
Kein Bild
BO Heat Vent Medium
Kein Bild
BO Heat Vent Medium
Kein Bild
BO Heat Vent Medium
Kein Bild
BO Heat Vent Medium
Kein Bild
BO Heat Vent Medium
Kein Bild
BO Heat Vent Medium
Kein Bild
BO Heat Vent Medium
Kein Bild
BO Heat Vent Medium
Kein Bild
BO Heat Vent Medium
Kein Bild
BO Heat Vent Medium
Kein Bild
BO Heat Vent Medium
Kein Bild
BO Heat Vent Medium
Kein Bild
BO Heat Vent Medium
Kein Bild
BO Heat Vent Medium
Kein Bild
BO Heat Vent Medium
Kein Bild
BO Heat Vent Medium
Kein Bild
BO Heat Vent Medium
Kein Bild
BO Heat Vent Medium
Kein Bild
BO Heat Vent Medium
Kein Bild
BO Heat Vent Medium
Kein Bild
BO Heat Vent Medium
Kein Bild
BO Heat Vent Medium
Kein Bild
BO Heat Vent Small
Kein Bild
BO Heat Vent Small
Kein Bild
BO Heat Vent Small
Kein Bild
BO Heat Vent Small
Kein Bild
BO Heat Vent Small
Kein Bild
BO Heat Vent Small
Kein Bild
BO Heat Vent Small
Kein Bild
BO Heat Vent Small
Kein Bild
BO Heat Vent Small
Kein Bild
BO Heat Vent Small
Kein Bild
BO Heat Vent Small
Kein Bild
BO Heat Vent Small
Kein Bild
BO Heat Vent Small
Kein Bild
BO Heat Vent Small
Kein Bild
BO Heat Vent Small
Kein Bild
BO Heat Vent Small
Kein Bild
BO Heat Vent Small
Kein Bild
BO Heat Vent Small
Kein Bild
BO Heat Vent Small
Kein Bild
BO Heat Vent Small
Kein Bild
BO Heat Vent Small
Kein Bild
BO Heat Vent Small
Kein Bild
BO Heat Vent Small
Kein Bild
BO Heat Vent Small
Kein Bild
BO Heat Vent Small
Kein Bild
BO Heat Vent Small
Kein Bild
BO Heat Vent Small
Kein Bild
BO Heat Vent Small
Kein Bild
BO Heat Vent Small
Kein Bild
BO Heat Vent Small
Kein Bild
BO Heat Vent Small
Kein Bild
BO Heat Vent Small
Kein Bild
BO Heat Vent Small
Kein Bild
CG Graveyard Small Vent 01a
Kein Bild
CG Graveyard Small Vent 01a
Kein Bild
CG Graveyard Small Vent 01a
Kein Bild
CG Graveyard Small Vent 01a
Kein Bild
CG Graveyard Small Vent 01a
Kein Bild
CG Graveyard Small Vent 01a
Kein Bild
CG Graveyard Small Vent 01a
Kein Bild
CG Graveyard Small Vent 01a
Kein Bild
CG Graveyard Small Vent 01a
Kein Bild
CG Graveyard Small Vent 01a
Kein Bild
CG Graveyard Small Vent 01a
Kein Bild
CG Graveyard Small Vent 01a
Kein Bild
CG Graveyard Small Vent 01a
Kein Bild
CG Graveyard Small Vent 01a
Kein Bild
CG Graveyard Small Vent 01a
Kein Bild
CG Graveyard Small Vent 01a
Kein Bild
CG Graveyard Small Vent 01a
Kein Bild
CG Graveyard Small Vent 01a
Kein Bild
CG Graveyard Small Vent 01a
Kein Bild
CG Graveyard Small Vent 01a
Kein Bild
CG Graveyard Small Vent 01a
Kein Bild
CG Graveyard Small Vent 01a
Kein Bild
CG Graveyard Small Vent 01a
Kein Bild
CG Graveyard Small Vent 01a
Kein Bild
CG Graveyard Small Vent 01a
Kein Bild
CG Graveyard Small Vent 01a
Kein Bild
CG Graveyard Small Vent 01a
Kein Bild
CG Graveyard Small Vent 01a
Kein Bild
CG Graveyard Small Vent 01a
Kein Bild
CG Graveyard Small Vent 01a
Kein Bild
CG Graveyard Small Vent 01a
Kein Bild
CG Graveyard Small Vent 01a
Kein Bild
CG Graveyard Small Vent 01a
Kein Bild
CG Graveyard Small Vent 01a
Kein Bild
CG Graveyard Small Vent 01a
Kein Bild
CG Graveyard Small Vent 01a
Kein Bild
CG Graveyard Small Vent 01a
Kein Bild
CG Graveyard Small Vent 01a
Kein Bild
CG Graveyard Small Vent 01a
Kein Bild
CG Graveyard Small Vent 01a
Kein Bild
CG Graveyard Small Vent 01a
Kein Bild
CG Graveyard Small Vent 01a
Kein Bild
CG Graveyard Small Vent 01a
Kein Bild
CG Graveyard Small Vent 01a
Kein Bild
CG Graveyard Small Vent 01a
Kein Bild
CG Graveyard Small Vent 01a
Kein Bild
CG Graveyard Small Vent 01a
Kein Bild
CG Graveyard Small Vent 01a
Kein Bild
CG Graveyard Small Vent 01a
Kein Bild
CG Graveyard Small Vent 01a
Kein Bild
CG Graveyard Small Vent 01a
Kein Bild
CG Graveyard Small Vent 01a
Kein Bild
CG Graveyard Small Vent 01a
Kein Bild
CG Graveyard Small Vent 01a
Kein Bild
CG Graveyard Small Vent 01a
Kein Bild
CG Graveyard Small Vent 01a
Kein Bild
CG Graveyard Small Vent 01a
Kein Bild
CG Graveyard Small Vent 01a
Kein Bild
CG Graveyard Small Vent 01a
Kein Bild
CG Graveyard Small Vent 01a
Kein Bild
CG Graveyard Small Vent 01a
Kein Bild
CG Graveyard Small Vent 01a
Kein Bild
CG Graveyard Small Vent 01a
Kein Bild
CG Rock Thermal Vent 01a
Kein Bild
CG Rock Thermal Vent 01a
Kein Bild
CG Rock Thermal Vent 01a
Kein Bild
CG Rock Thermal Vent 01a
Kein Bild
CG Rock Thermal Vent 01a
Kein Bild
CG Rock Thermal Vent 01a
Kein Bild
CG Rock Thermal Vent 01a
Kein Bild
CG Rock Thermal Vent 01a
Kein Bild
CG Rock Thermal Vent 01a
Kein Bild
CG Rock Thermal Vent 01a
Kein Bild
CG Rock Thermal Vent 01a
Kein Bild
CG Rock Thermal Vent 01a
Kein Bild
CG Rock Thermal Vent 01a
Kein Bild
CG Rock Thermal Vent 01a
Kein Bild
CG Rock Thermal Vent 01a
Kein Bild
CG Rock Thermal Vent 01a
Kein Bild
CG Rock Thermal Vent 01a
Kein Bild
CG Rock Thermal Vent 01a
Kein Bild
CG Rock Thermal Vent 01a
Kein Bild
CG Rock Thermal Vent 01a
Kein Bild
CG Rock Thermal Vent 01a
Kein Bild
Cicada Vent Fall
Kein Bild
Fabricator Damaged
Kein Bild
Minor Threat Poison Tube Cluster
Kein Bild
Minor Threat Poison Tube Cluster
Kein Bild
Minor Threat Poison Tube Cluster
Kein Bild
Minor Threat Poison Tube Cluster
Kein Bild
Minor Threat Poison Tube Cluster
Kein Bild
Minor Threat Poison Tube Cluster
Kein Bild
Minor Threat Poison Tube Cluster
Kein Bild
Minor Threat Poison Tube Cluster
Kein Bild
Minor Threat Poison Tube Cluster
Kein Bild
Minor Threat Poison Tube Cluster
Kein Bild
Minor Threat Poison Tube Cluster
Kein Bild
Minor Threat Poison Tube Cluster
Kein Bild
Minor Threat Poison Tube Cluster
Kein Bild
Minor Threat Poison Tube Cluster
Kein Bild
Minor Threat Poison Tube Cluster
Kein Bild
Minor Threat Poison Tube Cluster
Kein Bild
Minor Threat Poison Tube Cluster
Kein Bild
Minor Threat Poison Tube Cluster
Kein Bild
Minor Threat Poison Tube Cluster
Kein Bild
Minor Threat Poison Tube Cluster
Kein Bild
Minor Threat Poison Tube Cluster
Kein Bild
Minor Threat Poison Tube Cluster
Kein Bild
Minor Threat Poison Tube Cluster
Kein Bild
Minor Threat Poison Tube Cluster
Kein Bild
Minor Threat Poison Tube Cluster
Kein Bild
Minor Threat Poison Tube Cluster
Kein Bild
Minor Threat Poison Tube Cluster
Kein Bild
Minor Threat Poison Tube Cluster
Kein Bild
Minor Threat Poison Tube Cluster
Kein Bild
Minor Threat Poison Tube Cluster
Kein Bild
Minor Threat Poison Tube Cluster
Kein Bild
Minor Threat Poison Tube Cluster
Kein Bild
Minor Threat Poison Tube Cluster
Kein Bild
Minor Threat Poison Tube Cluster
Kein Bild
Minor Threat Poison Tube Cluster
Kein Bild
Minor Threat Poison Tube Cluster
Kein Bild
Minor Threat Poison Tube Cluster
Kein Bild
Minor Threat Poison Tube Cluster
Kein Bild
Minor Threat Poison Tube Cluster
Kein Bild
Minor Threat Poison Tube Cluster
Kein Bild
Minor Threat Poison Tube Cluster
Minor Threat Poison Tube Cluster
Kein Bild
OR Wreck3 Vents
Kein Bild
OR Wreck3 Vents
Kein Bild
Temperature Region Volume Spire Heat Sm Proto
Kein Bild
Temperature Region Volume Spire Heat Sm Proto
Kein Bild
Temperature Region Volume Spire Heat Sm Proto
Kein Bild
Temperature Region Volume Spire Heat Sm Proto
Kein Bild
Temperature Region Volume Spire Heat Sm Proto
Kein Bild
Temperature Region Volume Spire Heat Sm Proto
Kein Bild
Temperature Region Volume Spire Heat Sm Proto
Kein Bild
Temperature Region Volume Spire Heat Sm Proto
Kein Bild
Temperature Region Volume Spire Heat Sm Proto
Kein Bild
Temperature Region Volume Spire Heat Sm Proto
Kein Bild
Temperature Region Volume Spire Heat Sm Proto
Kein Bild
Temperature Region Volume Spire Heat Sm Proto
Kein Bild
Temperature Region Volume Spire Heat Sm Proto
Kein Bild
Temperature Region Volume Spire Heat Sm Proto
Kein Bild
Temperature Region Volume Spire Heat Sm Proto
Kein Bild
Temperature Region Volume Spire Heat Sm Proto
Kein Bild
Temperature Region Volume Spire Heat Sm Proto
Kein Bild
Temperature Region Volume Spire Heat Sm Proto
Kein Bild
Temperature Region Volume Spire Heat Sm Proto
Kein Bild
Temperature Region Volume Spire Heat Sm Proto
Kein Bild
Temperature Region Volume Spire Heat Sm Proto
Kein Bild
Temperature Region Volume Spire Heat Sm Proto
Kein Bild
Temperature Region Volume Spire Heat Sm Proto
Kein Bild
Temperature Region Volume Spire Heat Sm Proto
Kein Bild
Temperature Region Volume Spire Heat Sm Proto
Kein Bild
Temperature Region Volume Spire Heat Sm Proto
Kein Bild
Temperature Region Volume Spire Heat Sm Proto
Kein Bild
Temperature Region Volume Spire Heat Sm Proto
Kein Bild
Temperature Region Volume Spire Heat Sm Proto
Kein Bild
Temperature Region Volume Spire Heat Sm Proto
Kein Bild
Temperature Region Volume Spire Heat Sm Proto
Kein Bild
Temperature Region Volume Spire Heat Sm Proto
Kein Bild
Temperature Region Volume Spire Heat Sm Proto
Kein Bild
Temperature Region Volume Spire Heat Sm Proto
Kein Bild
Temperature Region Volume Spire Heat Sm Proto
Kein Bild
Temperature Region Volume Spire Heat Sm Proto
Kein Bild
Temperature Region Volume Spire Heat Sm Proto
Kein Bild
Temperature Region Volume Spire Heat Sm Proto
Kein Bild
Temperature Region Volume Spire Heat Sm Proto
Kein Bild
Temperature Region Volume Spire Heat Sm Proto
Kein Bild
Temperature Region Volume Spire Heat Sm Proto
Kein Bild
Temperature Region Volume Spire Heat Sm Proto
Kein Bild
Temperature Region Volume Spire Heat Sm Proto
Kein Bild
Temperature Region Volume Spire Heat Sm Proto
Kein Bild
Temperature Region Volume Spire Heat Sm Proto
Kein Bild
Temperature Region Volume Spire Heat Sm Proto
Kein Bild
Temperature Region Volume Spire Heat Sm Proto
Kein Bild
Temperature Region Volume Spire Heat Sm Proto
Kein Bild
Temperature Region Volume Spire Heat Sm Proto
Kein Bild
Temperature Region Volume Spire Heat Sm Proto
Kein Bild
Temperature Region Volume Spire Heat Sm Proto
Kein Bild
Temperature Region Volume Spire Heat Sm Proto
Kein Bild
Temperature Region Volume Spire Heat Sm Proto
Kein Bild
Temperature Region Volume Spire Heat Sm Proto
Kein Bild
Temperature Region Volume Spire Heat Sm Proto
Kein Bild
Temperature Region Volume Spire Heat Sm Proto
Kein Bild
Temperature Region Volume Spire Heat Sm Proto
Kein Bild
Temperature Region Volume Spire Heat Sm Proto
Kein Bild
Temperature Region Volume Spire Heat Sm Proto
Kein Bild
Temperature Region Volume Spire Heat Sm Proto
Kein Bild
Temperature Region Volume Spire Heat Sm Proto
Kein Bild
Temperature Region Volume Spire Heat Sm Proto
Kein Bild
Temperature Region Volume Spire Heat Sm Proto
Kein Bild
Temperature Region Volume Spire Heat Sm Proto
Kein Bild
Temperature Region Volume Spire Heat Sm Proto
Kein Bild
Temperature Region Volume Spire Heat Sm Proto
Kein Bild
Temperature Region Volume Spire Heat Sm Proto
Kein Bild
Temperature Region Volume Spire Heat Sm Proto
Kein Bild
Temperature Region Volume Spire Heat Sm Proto
Kein Bild
Temperature Region Volume Spire Heat Sm Proto
Kein Bild
Temperature Region Volume Spire Heat Sm Proto
Kein Bild
Temperature Region Volume Spire Heat Sm Proto
Kein Bild
Temperature Region Volume Spire Heat Sm Proto
Kein Bild
Temperature Region Volume Spire Heat Sm Proto
Kein Bild
Temperature Region Volume Spire Heat Sm Proto
Kein Bild
Temperature Region Volume Spire Heat Sm Proto
Kein Bild
Temperature Region Volume Spire Heat Sm Proto
Kein Bild
Temperature Region Volume Spire Heat Sm Proto
Kein Bild
Temperature Region Volume Spire Heat Sm Proto
Kein Bild
Temperature Region Volume Spire Heat Sm Proto
Kein Bild
Axum Ruins Observatory Island Cold1
Kein Bild
Axum Ruins Observatory Island Cold2
Kein Bild
Axum Ruins Observatory Island Heat1
Kein Bild
Axum Ruins Observatory Island Heat2
Kein Bild
Axum Ruins Power Plant Cold1
Kein Bild
Axum Ruins Power Plant Cold2
Kein Bild
Axum Ruins Power Plant Heat1
Kein Bild
Axum Ruins Power Plant Heat2
Kein Bild
Axum Ruins Root Canyon Cold2
Kein Bild
Axum Ruins Root Canyon Heat1
Kein Bild
Axum Ruins Root Canyon Heat2
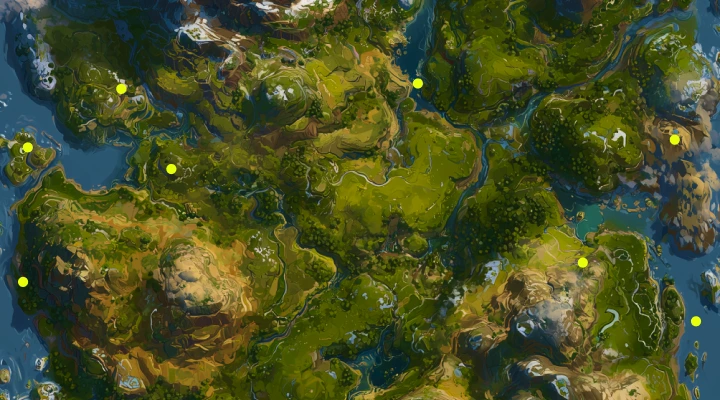
Kartenfilter-Einstellungen
Dieser Link enthält Kartenfilter. Möchtest du diese verwenden oder deine gespeicherten Filter behalten?
Kriegsnebel zurücksetzen?
Dies löscht alle entdeckten Bereiche für diese Karte. Dies kann nicht rückgängig gemacht werden.